So, I was making stock out of that Buffalo soup bone yesterday right? It was going so well too. I would add more water every hour or so and check on it. Then after it had been simmering for about 4 hours I stirred it and found this piece of meat/bone that looked like a hand. Yep, you read that right. It looked like a human hand. TOTALLY creeped me out and grossed me out. So I tried to bread it apart and went on my merry way. (Trying to forget about the hand in the pot...)
Then a couple more hours passed and it was about done. But when my husband got home from work I was just rather nauseated from the smell of the buffalo and the thought of the hand. He assured me that it looked like it was ribs with part of the sternum...but that didn't help me. So, he disposed of the stock and bones and I about died from the smell....we picked something up to eat and I will never again attempt to make stock out of a gamey animal. Or possible any animal ever again.....
I guess that's what I get for a keen sense of smell and an overactive imagination? :)

Tuesday, August 31, 2010
Monday, August 30, 2010
Whole Wheat Bread
This is my new standby recipe. Versatile because it can be used for: bread, rolls, cinnamon rolls, pizza dough and much more.... :) And it's only made from 5 wholesome ingredients.
1 T. yeast
3/4 warm water
3/4 milk
2 T. honey
3-3.5 c. whole wheat flour (fresh ground is best, since I don't have a mill I prefer King Arthur's)
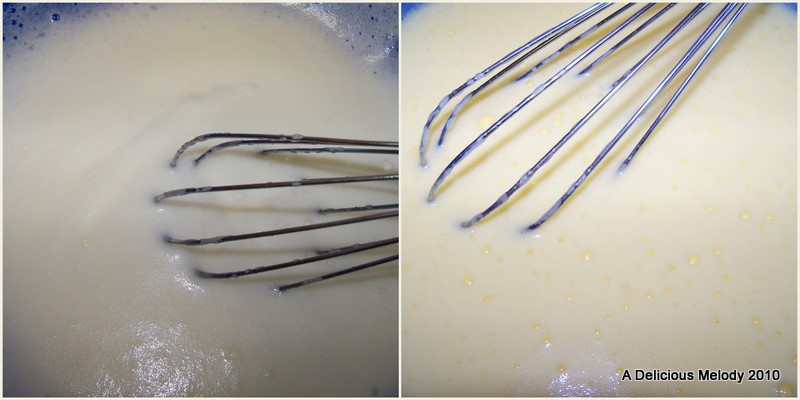
1. In a large bowl whisk yeast and warm water together. Then let rest for about 10 minutes. When you come back it will look kind of frothy.
2. Stir in milk and honey. Then add about 3 c. flour and mix. Depending on the climate you may need more flour at this point. (I do in NC, but you may not in CO.) Once it's a firm, but not sticky dough let it rest to rise for about 1 hour.
3. Get out bread pan/baking sheets (spray if desired) and punch down the dough. Then make into a loaf, rolls, etc... and let rise for another 15 or so minutes. (While it's rising this last time, preheat the oven to 350degrees.)
4. Bake at 350 degrees for 35-45 for bread, 15 for rolls or pizza. (Other things keep an eye on the oven, and experiment!) :)
5. Enjoy!
1 T. yeast
3/4 warm water
3/4 milk
2 T. honey
3-3.5 c. whole wheat flour (fresh ground is best, since I don't have a mill I prefer King Arthur's)
1. In a large bowl whisk yeast and warm water together. Then let rest for about 10 minutes. When you come back it will look kind of frothy.
2. Stir in milk and honey. Then add about 3 c. flour and mix. Depending on the climate you may need more flour at this point. (I do in NC, but you may not in CO.) Once it's a firm, but not sticky dough let it rest to rise for about 1 hour.
3. Get out bread pan/baking sheets (spray if desired) and punch down the dough. Then make into a loaf, rolls, etc... and let rise for another 15 or so minutes. (While it's rising this last time, preheat the oven to 350degrees.)
4. Bake at 350 degrees for 35-45 for bread, 15 for rolls or pizza. (Other things keep an eye on the oven, and experiment!) :)
5. Enjoy!
Salmon Sandwiches
I don't know about you, but I think lunch can easily be my least favorite meal of the day. Not because there is anything inherantly wrong with it, or bad about it....just that it chops up my day and I usually have to spend time making something to eat. Know what I mean?!? Anyway, I am always on the lookout for quick and easy lunch ideas. Usually they are not super healthy though... Then there's always tuna salad but, I heard recently that the levels of mercury in canned tuna are really quite high, so they are recommending eating canned salmon in its place now. Here's an article about it.
So, when the hubs and I were out this weekend I picked up 5 pouches of Pink Salmon to have on hand. (Although I still do have some Albacore tuna in the pantry...which I suppose will stay there for a while.)
Thus bringing me to today's lunch idea! I started making stock out of my buffalo soup bones this morning around 10 or so, and also decided to make some whole wheat rolls for this week. (Some for me, some for hubby and some for bruscetta for tonight!) So, then it was just about lunch time and I was wondering what to make. Then it dawned on me...yummy salmon sandwich. I didn't know what I would think of a salmon salad sandwhich, so this is what I did instead! And I loved it, and it's super healthy!

Salmon Sandwiches:
1 Small Pouch Pink Salmon
3/4 c. Zucchini, finely shredded
1 T. Onion, finely diced
1 t. Extra Virgin Olive Oil
4 Whole Wheat Rolls
1. Put the Olive oil in a small skillet on medium high, then add the onion, salmon and zucchini.
2. Saute for about 2 minutes or until most of the moisture is out of the zucchini.
3. Split rolls open and put 1/4 of the salmon mixture on each.
4. Serve warm or chilled. Enjoy!
(Not salt, pepper, mayo, mustard, etc. needed!)
Sunday, August 29, 2010
Farmer's market
Well, one thing we certainly like around this part of the country is that their farmer's markets go way later than back in CO. The main one in Durham goes until Thanksgiving, the main one in Raleigh is so big it's indoors and year-round, and there's a lot more than that. It's great! :)

Where the magic happens at the Durham Farmer's Market.... Pretty huh? Can hardly believe it was only established in 2001 ...
Anyway, stay tuned for a new recipe this week containing that buffalo soup bone... and maybe some others along the way! ;)
Yesterday we ventured to the Durham Farmer's Market to check it out, and we were impressed. Just to name a few things that we got while at the market: buffalo soup bone (super cheap too, and I can't wait to make some soup with it!!), pecan chewy (to eat while looking at vendors), peppers, fresh edamame and basil. I had a list of things I wanted to get, but then once we were there it morphed a bit because of good deals on certain things like the soup bone. :) Also on the way home, we stopped at a grocery store to get tomatoes, fruit and a few other things to round out of the finds. Overall a successful market, and a good time! :) Did I mention it was SUPER hot out though? We melted a bit with every step... We stayed hydrated though and still had a fabulous time!

Where the magic happens at the Durham Farmer's Market.... Pretty huh? Can hardly believe it was only established in 2001 ...
Anyway, stay tuned for a new recipe this week containing that buffalo soup bone... and maybe some others along the way! ;)
Tuesday, August 24, 2010
Apple Butter
I did my first batch as a test batch and it was really small in case it didn't turn out. So, if you'd like more than 8 oz. of apple butter in the end, you should make a quadruple or so batch of this. :)
Apple Butter
4 apples, peeled (Sweeter apples like Braeburn, Gala, Fuji, Delicious...I used braeburns)
2 T. apple cider vinegar
1/2 c. water
1 T. lemon juice
1/4 c. sugar
1 tsp. cinnamon
What you'll need:
Pot to make apple butter in.
Canning supplies (Canner, funnel, tongs, rack (optional))
1. Core and then cut up the peeled apples into small pieces. Put the pieces into a pan and also put the cores in the pan. (We all know that apples have a lot of pectin in them, and rumor has it that a lot of that pectin is in the core.)
 2. Add the lemon juice, vinegar and water to the apples. Then bring them to a boil on high for about a minute. Then let them simmer for about 30 minutes or until very, very tender.
 3. Once they are cooked they should look something like this....(above)
 4. Then in order to get a smooth texture you'll want to put the cooked apples through a sieve or mesh strainer (like shown).
 5. Getting it all through the strainer will take some time, but be patient because it will be worth it in the end! :)
6. Once it's all been strained place it back in the pot on medium-high. Then add the sugar and cinnamon, stirring until it comes to a boil for one minute.

7. Then place in clean jars, with lids and bands. Water Process for 10 minutes at sea level and adjust for higher elevations.

Apple Butter
4 apples, peeled (Sweeter apples like Braeburn, Gala, Fuji, Delicious...I used braeburns)
2 T. apple cider vinegar
1/2 c. water
1 T. lemon juice
1/4 c. sugar
1 tsp. cinnamon
What you'll need:
Pot to make apple butter in.
Canning supplies (Canner, funnel, tongs, rack (optional))
1. Core and then cut up the peeled apples into small pieces. Put the pieces into a pan and also put the cores in the pan. (We all know that apples have a lot of pectin in them, and rumor has it that a lot of that pectin is in the core.)


6. Once it's all been strained place it back in the pot on medium-high. Then add the sugar and cinnamon, stirring until it comes to a boil for one minute.

7. Then place in clean jars, with lids and bands. Water Process for 10 minutes at sea level and adjust for higher elevations.

Canning
Well, it's that time of year. I suppose it always could be that time of year actually though. Anyway, I did some canning today. I made one batch of peach jam, one batch of organic peach jam and a test batch of apple butter. So, I should be stocked up on homemade jam for a while! (Which is always fantastic!!) :)
I was so into my groove in the kitchen that I hardly took any pics. Literally....I took 8, and most of them are from the apple butter test. So...that's a sad day. But, truth be told I didn't do anything too special with the peach jam anyway...just went with the traditional recipe in the box of Sure-jell. (You know, the one that says 4 c. peeled, pitted, chopped peaches, 5.5 c. sugar and 1 pkg. Sure-jell.)
So for my first batch I used regular peaches I had gotten at wal-mart. They were ripe, but still firm. That batch went well and gave me 2 pints, and 7 little 4 oz. jam jars worth!

My second batch was made from Organic peaches that I got at King Soopers. They were also ripe but firm. This batch went well too and yielded 2 pints, one 1/2 pint and 3 or 4 little 4 oz. jam jars.
 Of course after I had gotten each batch in their jars (respectively) I water processed them for 10 minutes. It seemed weird to only have to process them that short...since back in CO it was SO longer because of the elevation!
So after I did the jam, I wanted to try some apple butter. I looked for recipes but they all added so much sugar and used tart apples. So, I bet you know what's coming, I made my own recipe. :)
I was so into my groove in the kitchen that I hardly took any pics. Literally....I took 8, and most of them are from the apple butter test. So...that's a sad day. But, truth be told I didn't do anything too special with the peach jam anyway...just went with the traditional recipe in the box of Sure-jell. (You know, the one that says 4 c. peeled, pitted, chopped peaches, 5.5 c. sugar and 1 pkg. Sure-jell.)
So for my first batch I used regular peaches I had gotten at wal-mart. They were ripe, but still firm. That batch went well and gave me 2 pints, and 7 little 4 oz. jam jars worth!

My second batch was made from Organic peaches that I got at King Soopers. They were also ripe but firm. This batch went well too and yielded 2 pints, one 1/2 pint and 3 or 4 little 4 oz. jam jars.

So after I did the jam, I wanted to try some apple butter. I looked for recipes but they all added so much sugar and used tart apples. So, I bet you know what's coming, I made my own recipe. :)
Friday, August 20, 2010
Summer Veggies
So made this for lunch yesterday and loved it! In fact I loved it so much I made it for part of dinner too! But then, when I was taking photos of it I had this sad realization. That realization was that it looks so much like one of those bags of frozen veggies....oh well. Here it is. I think it tastes a lot better than the frozen ones.... :)
Summer Veggies
2 Cloves Garlic, minced
1 Small Onion, diced
2 T. Margarine/Butter (You could also use EVOO)
1 c. Fresh Carrots, julienned
1 c. Fresh Green beans, in about 1.5" pieces
1 c. Water
1 c. Fresh Corn, just shuck it and then just it off the ear.


Summer Veggies
2 Cloves Garlic, minced
1 Small Onion, diced
2 T. Margarine/Butter (You could also use EVOO)
1 c. Fresh Carrots, julienned
1 c. Fresh Green beans, in about 1.5" pieces
1 c. Water
1 c. Fresh Corn, just shuck it and then just it off the ear.
1. On medium heat saute the onion and garlic in the 2 T. of butter.

2. Once the onions are looking transparent, get ready to add the carrots and beans.

3. Add the carrots, green beans and water. Then cover it and let it cook for about 3 minutes.


4. Add the corn and stir it in. Continue to let it cook until the corn is tender. (About 2-3 minutes.)

(It should look something like this below when you are about done!)

5. Serve and enjoy! I know we sure did! :)

Wednesday, August 18, 2010
Chile Rellenos
Chile Rellenos
1 lb. peppers (poblano or anaheim work best)
3/4 c. cream cheese (I used low-fat, but whatever works. Also another soft cheese could be substituted.)
Ground Pepper
4 eggs, separated
1/4 c. flour
1. Preheat the oven to 450 degrees. Then wash and dry the peppers.
2. Place the peppers on a baking sheet and bake (or rather more like roast) the peppers for 7-10 minutes on each side @ 450. (I used Anaheim peppers, so adjust your times if you are using a smaller pepper like the jalapeno.)
 3. Once they are done "roasting" let them cool a bit. (The should look blackened.) While you are waiting on the peppers to cool off, mix up the cream cheese and pepper. Just add enough ground black pepper to taste. Mix it up nicely though, so it will be easier to stuff inside the chiles.
 4. Take the blackened peel off the outside of them. Then seed them, by cutting a slit about 1/2 down one side starting at the top of the pepper. Then use a spoon (I found a grapefruit spoons works really well) to scoop out the seeds. Rinse them off when you are done seeding, to get any remaining seeds out. (The seeds in peppers are what really heats things up, so feel free to leave them in if you'd like a mouth of fire later on.) :)
 5. Now you are ready to stuff those chiles! So, divide up the cream cheese for how many peppers you have. (I had 3 peppers but one was really big, so I divided the cheese into 4ths and put 1/4 in each of the smaller peppers, and 2/4 (or 1/2) in the big one!) Then carefully stuff the cheese into the peppers. Be careful because the roasted peppers are really quite delicate. I accidentally tore one all the way down the side. So try to not do that with yours! :)
 6. Now on to the batter. Using a whisk or hand mixer whip up the egg whites until they are white and fluffy. Then fold in the yolks and beat some more to ensure it's combined and still fluffy.
 8. Put the flour on a plate and roll each pepper in the flour before putting it in the egg batter. (Make sure flour gets everywhere as it will help the batter to stick to them!)
 9. In a medium-high skillet cook these until golden brown on each side. (It was about 2 minutes or so a side for mine.)
 10. Serve and enjoy! :)

To be honest, they weren't as good as ones I have had in restaurants before. But that might all have to go with the crispiness. I order them crispy at restaurants...And these didn't turn out crispy. They were good and full of flavor that I like, but I guess I need to perfect the crispiness next time. :)
P.S. Of course you can put sauce on these, I'm just not a saucy gal...
1 lb. peppers (poblano or anaheim work best)
3/4 c. cream cheese (I used low-fat, but whatever works. Also another soft cheese could be substituted.)
Ground Pepper
4 eggs, separated
1/4 c. flour
1. Preheat the oven to 450 degrees. Then wash and dry the peppers.
2. Place the peppers on a baking sheet and bake (or rather more like roast) the peppers for 7-10 minutes on each side @ 450. (I used Anaheim peppers, so adjust your times if you are using a smaller pepper like the jalapeno.)


To be honest, they weren't as good as ones I have had in restaurants before. But that might all have to go with the crispiness. I order them crispy at restaurants...And these didn't turn out crispy. They were good and full of flavor that I like, but I guess I need to perfect the crispiness next time. :)
P.S. Of course you can put sauce on these, I'm just not a saucy gal...
Tuesday, August 17, 2010
Frugal's Grilled Cheese Sandwiches
Have you ever had a grilled cheese from Frugals? Or, have you ever been to Frugals? They are located in Montana and Washington and have fantastic food at a great price! :) So next time you are either in Montana or Washington, you should try to grab some food from there. They feature double drive-thrus for your convenience too. :)
Ever since I had a grilled cheese from Frugals back in the summer of 2004 I have wanted another! I can make them at home that taste about the same, but theirs are still just special. Here's how you can make them at home, and they really are quite frugal too. :)
Frugal's Grilled Cheese:
Hamburger Buns
Butter/Margarine
Velveeta Cheese (or other American Cheese will do, I just prefer to use Velveeta.)
1. Butter the insides of the buns. These insides will soon be outsides to the grilled cheese sandwiches.

2. Preheat a pan on medium high.

3. Slice the velveeta and place on the outsides (now insides) of the buns.

4. Place the sandwiches in the preheated skillet and cook until golden brown on each side. Flatten as you go to ensure they stick together. I also like to call these "flat" grilled cheese. :) Sounds random...but they are SOOO good!

5. Serve and enjoy. Beware, the cheese gets hot and gooey! Yum! :)
I made these last night and served chips and salsa along side. Big hit with my hubs too. :)
Sunday, August 15, 2010
Easy Southwestern Burgers
So, I'm back on here! Sorry it's been SO long....but I think I have my mojo back in the kitchen after the move. So you will probably be hearing a lot more from me. :) (Don't worry, I have cooked things at home for the last week and a half or so...it's just not been anything worth writing about...and I've been busy unpacking, etc...)
Easy Southwestern Burgers:
1 # Ground Beef
1 can Rotel
1/2 c. Water
1 Egg
Buns (1 Bun for meat mixture, others for burgers)
Corn Salsa, optional but a great addition to this burg.

1. Put 1 bun in a large mixing bowl and pour water over it. (Let soak for a couple minutes.)
2. Mix in egg, rotel and ground beef until well combined.
3. Shape into patties. (I started out making it into 4 patties, but they ended up being HUGE, so I ended up making 5 still pretty big patties. So I think this would make into 6 nice sized patties.)
4. Cook as many patties as you'd like, however you like. (Grill, Foreman, Pan, etc...whichever way is easiest for you! And be sure to cook it throughly, but it will be slightly pink because of the tomatoes in the rotel.)
5. Place on buns and serve with corn salsa on top if desired! :)
Enjoy!
Subscribe to:
Posts (Atom)