Wednesday, December 15, 2010

Bizcochito (Anise Cookies)

Now, it's just 10 days till Christmas! Have you decided which cookies to make this year? Whether you have decided or not, you may want to consider these! If you aren't from New Mexico, you probably haven't ever heard of them. The only reason I've had them is because I had a roommate in college with family from NM, and she made these cookies for me once.

Anyway, bizcochitos are crispy cookies (basically sugar cookies) flavored with anise and cinnamon. These cookies were said to have been developed by residents of New Mexico from the first Spanish colonists. In fact, in 1989 these were named the official cookie of New Mexico. Interesting huh? The cookies are served during special times of the year such as weddings, baptisms and holidays, especially Christmas! So that's why I've included my recipe for these great little anise cookies before Christmas! :)

Bizcochito:
1/2 c. Shortening/Butter
1 c. Sugar
1 Egg
1 T. Anise Seeds
1/2 t. Cinnamon, ground
1 t. Vanilla
1 t. Baking Powder
1 t. Baking Soda
1.5 to 2 c. Flour

1. Cream together shortening, sugar and anise seeds.
2. Mix in the rest of the ingredients thoroughly.
3. Roll out the dough to about 1/4" thick and cut with cookie cutters.

4. Place about 1" apart on a baking sheet and bake for about 5 minutes, or until golden.
5. Immediately after the cookies come out of the oven sprinkle with sugar.
Store in an airtight container. Maybe send them to work with your sweetie for them and their co-workers.... ;) These are crispy and perfectly flavored little cookies!! :) Happy Baking!

Tuesday, December 14, 2010

Chicken Kiev

Have you ever had this?  Or perhaps you've had something called Chicken Cordon Bleu?  Kiev and Cordon Bleu are like cousins or siblings really.  Chicken Kiev is a popular dish, and consists of a boneless, skinless chicken breast that is pounded and rolled with butter, then breaded and cooked.  According to Wikipedia, Chicken Kiev was invented in Russian in the early 1900's.  (Even though we may think it came from Ukraine because Kiev is the Capital of Ukraine.)  


What you'll need:
Boneless Skinless Chicken breasts 
Butter
Herbs, optional
Garlic, optional
Bread crumbs (seasoned or not)
Egg (whisked with 1 T. water)

 1.  Preheat oven to 350 degrees.  Using a meat tenderizer pound the chicken breasts until they are about 3/8" thick.
 2.  Spread butter over the flattened chicken and put garlic and/or herbs, if desired, on top of the butter.
 3.  Roll the chicken up neatly and you can secure with toothpicks if desired.
 4.  Dip the chicken into the egg mixture, and then dip into the bread crumbs.  Make sure the crumbs cover the chicken completely.
5.  Place the breaded chicken on a baking sheet and repeat steps 1 to 4 for the rest of the chicken breasts.
6.  Bake the Chicken Kiev's in the preheated oven for about 35-45 minutes, or until there is no pink.  (Time depends on thickness, and size.)
 Quite beautiful right?  Yum.....can't you just smell it?
Hm....we had these for dinner and just loved them.  I just love them....  Simple.  Beautiful.  Tasty.  And yep, so tasty.  :)

Monday, December 13, 2010

7 Last minute gifts for the Foodie in your life....

It's only 12 days till Christmas!  Here are some gift ideas for the foodie in your life.  Complete with links to buy the items on the list. :)
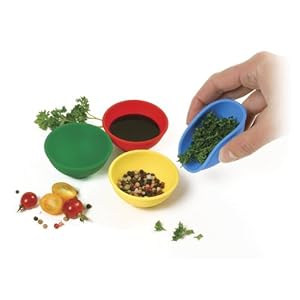
1.  How about some little silcone pinch bowls?  So cute, and practical.  (Amazon, ~$5)


2.  How about this awesome Cyclone Whisk?  It'll make whipping up a treat a breeze. (Wilton, ~$10)

3.  Baking will be super quick to clean up when you give them a silicone baking mat! (ReUseIt, ~$10.)

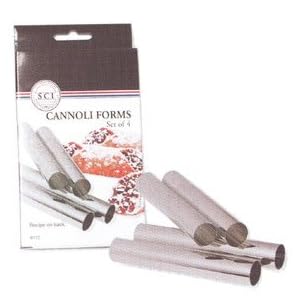
4.  These Cannoli forms will come in super handy for the pastry enthusiast!  (Amazon,~$5.)

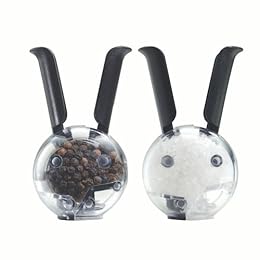
5.  That foodie will never misplace their salt and pepper again with these handy magnetic grinders!  Plus they'll have fresh ground salt and pepper at all times! :)  (Target, ~$20)

6.  How about these Star Wars sandwich cutters?  Adorable.  (Williams-Sonoma, ~$30 (on sale for $20))


7.  Maybe some adorable stacking mugs or really adorable stacking espresso mugs and saucers?  (World Market, ~$10)


Or maybe something from ADM's Cafepress Store.  Apron?  Water bottle?  Tote? You choose it!  :) (Items range in price.)

 I don't have any connections to any of the products on this list (except for the last one!), it's just some personal recommendations from me.  :)

Christmas Bread Wreath

Christmas is just 12 days away!  So here's a bread wreath you can make to help decorate your table, as well as fill your guests!  :)

Christmas Bread Wreath:
  Bread
1 pkg Yeast
1/4 c. Warm Water
1 c. Milk
1/4 c. Sugar
2 T. Oil
1 Egg
1 t. Salt
~4 c. Flour

  Filling
2 T. Butter/Marg. Melted
1/4 c. Brown Sugar
1/4 c. Sugar
1-2 t. Cinnamon
1/2 c. Craisins (or raisins)

  Topping
Icing (either simple powdered sugar icing or melted store-bought frosting)
Sliced Almonds, optional

1.  Dissolve yeast in water.  Then add yeast solution, milk, sugar, salt, oil and egg to a mixing bowl and combine.  Slowly mix in flour.  Let rest for about 15 minutes.
2.  Knead for 5 minutes and the let rise for about 10 minutes.

3.  Punch down and turn out onto a bread board.  Roll out dough into a rectangle like so.  Then spread melted butter, sugars, cinnamon and craisins over dough like so.
4.  Roll up the dough like a cinnamon roll log.  Then carefully transfer to a grease baking sheet placing the seam side down, and making into a circle.
5.  Once you have the circle of dough on the baking sheet pinch the ends together to make a true circle.  With a sharp knife cut slits on the inside of the circle like so.  Then make the cuts around the outside of the circle like so.  Finally spread the circle (stretch it) out like so.
6.  Bake in a preheated 350 degree oven for 15 minutes. Then remove and brush on egg wash. Then bake for another 15 minutes or until golden brown.
7.  Take the wreath out of the oven and wait until it is at least somewhat cool to put the icing on it!  Then just drizzle the powdered sugar icing or melted store-bought white frosting.  (Just put store-bought frosting on a bowl and microwave it for about 30 seconds and stir.)  Then sprinkle on the sliced almonds if desired.
Enjoy!  Just slice and serve!  :)  Yum! 

Don't be too alarmed when you take the wreath out of the oven to find some sugar has liquified and leaked out.  It will still taste great, trust me!  :)  (Refer to pic for example.)

Saturday, December 11, 2010

Hot Chocolate like Williams-Sonoma

Have you ever been to Williams-Sonoma around Christmas time?  I hadn't until today, and it was fantastic!  That store is always great, but it's even better right now!  They have samples of some things they sell like brownies, peppermint bark and their amazing hot chocolate!  After my hubby and I sampled the hot chocolate, I just couldn't wait to get home to make some of my own!   It's super easy with only two ingredients and you can totally cater it to your likes!  :)


Here's what you'll need for some amazing homemade, cold winter worthy hot chocolate!

1 oz. Chocolate, Shaved (per serving)
10 oz. Milk (per serving)

You can really use any chocolate, but the better quality of the chocolate--the better the hot chocolate will be!  I used some quality semi-sweet chocolate that I had on hand.  My hubby and I really liked the way it turned out.  But you can certainly try milk chocolate, dark chocolate or even unsweetened.  (Although you will probably have to add sugar to the unsweetened....)    And you can use any milk you have on hand.  I used nonfat and it was just fantastic!  :)

Here's what you do....

1.  Put the milk in a pot on the stove and slowly heat it up.  Stir rather frequently.  (Whisk works well.)
 2.  Once the milk is warm start whisking in the shaved chocolate until it is all melted.  Continue to whisk and heat the hot chocolate up until it is warm (hot) enough for your taste. :)
3.  Ladle into mugs and top with some extra chocolate shavings if desired.  :)

Enjoy!  :)  It's pretty much the MOST amazing hot chocolate I've ever had in my entire life!  In fact, it is.  And I just drank 10 wonder ounces of it....and may have to make some more!  :)  

Friday, December 10, 2010

Shortbread

I know it seems like people either love or hate this stuff....but I'm one who loves it!  I certainly couldn't eat it all the time or anything, but every once in a while it's a great little snack!  It especially goes well with coffee or tea!  :)

I know I've mentioned it before, but when I worked at that coffee shop we made lots of things from scratch.  Like cinnamon rolls, cakes, brownies, pound cakes, breads...and shortbread!  My boss was a little particular when it came to the way that all of us made his shortcake especially.  I guess I can see why...you know, he wanted it perfect, and if it's not done right it could get messed up.  But now I'm realizing that shortcake is something that I'm pretty sure no one could mess up....ok, maybe I shouldn't say that.  But it's easy peasy and great!  Here's my recipe, and yes it only has 4 ingredients!  :)

Shortbread:
1 Stick Butter (Unsalted)
1 c. Powdered Sugar
1 c. All Purpose flour
Pinch Salt

1.  Start with the stick of butter.  Just pull it out of the fridge and plop it in a bowl.  Then with a pastry blender (or fork) make it into smaller pieces like so.
 2.  Add the powdered sugar and combine with the butter using the pastry blender.
 3.  Add flour and salt, and again combine using the pastry blender until it looks about like this below...
4.  Pour the mixture into an 8" or 9" pan, then compact the mixture using a glass and finally add texture to the top using a fork.
Pour, compact and texture.
5.  Bake the shortbread in a preheated 350 degree oven for about 20-25 minutes, or until golden.
6.  Pull out of the oven and set pan on cooling rack for about 10 minutes.  After 10 minutes have passed slice the shortbread (or cut out with cookie cutters).  It's much easier to cut while warm, trust me.  :)

Enjoy!  It'll be crisp, crumbly and just perfect shortbread consistency!  Yum.  :)

Thursday, December 9, 2010

How to Make Knot Rolls

Rolls are another staple at the Thanksgiving, Christmas or other holiday table.  These aren't rocket science, but with just a little more effort than regular rolls, these will be a crowd pleaser! :)  You can use your favorite dough for this recipe.  (So either roll dough or bread dough will work.)

What you'll need:
Dough
Floured surface
Rolling Pin
Greased Pan
Preheated oven (350 degrees)

1.  Grab a section of dough and roll it out to about 1/2" thick.  Cut into about 1" strips.
2.  Pick up one strip and tie it in a knot. 
3.  Pinch the loose ends together.
4.  Flip knot over.
Step 1                     Step 2                       Step 3                        Step 4
 5.  Place knots on the greased pan about 2" apart.
 6.  Bake in a 350 degree oven for about 15 minutes or until golden.
Enjoy!  :)  

Krautburgers (Bierocks)


My family has always called these little wonders krautburgers, but they can also be called bierocks.  In fact, the only article on good ol' trusty wikipedia is on the latter.  These most likely start in Germany or Russia.  They are pasty filled with seasoned ground beef, cabbage and onions.  Then baked until golden.

I've been eating these ever since I can remember!  And I have always loved them.  (Even though I don't eat ground beef --in general.)  My sweet Mom told me that I could post her recipe for the filling!  So that's what you'll see below.  As for the dough, you can just use your favorite bread dough.  Sorry, our secret family recipe for the dough isn't making an appearance here now, or ever.  :)  (But, if you are lucky enough to eat dinner at any of my family's houses, you could probably encourage the cook of the house to make some of our special family recipe for ya!)  :)

Disclosure:  I like krautburgers/bierocks in general, but my Mom's recipe is by far my fave!  In fact, if there were one food I had to eat for every meal, for the rest of my life, it would definitely be these!  :)  They really are that good!


Krautburger Filling: 
(Recipe courtesy of my Mom who got it from my Grandma D.)
1 lb. Ground Beef
3 c. Shredded Cabbage (Can also double cabbage to make it go farther, and to reduce the meat to other filling ratio)
1/2 Medium Onion, chopped
1.5 t. Salt
Pepper to taste
1.5 c. Water

1.  Cook ground beef until browned.
2.  Add remaining ingredients and cook until water is absorbed.
Filling should look about like this...
3.  Once filling is cooked, allow to cool some.
4.  Roll out a section of the bread dough (your fave) and roll it about 1/4 thick.  Then cut into squares and fill with filling.  (Any size will due!)
5.  Seal the filling in the dough by pinching and turning over onto a baking sheet.
6.  Bake in a pre-heated 350 degree oven for about 15minutes.  (Or until golden!)
Enjoy!!!  I know you will!  :)

Wednesday, December 8, 2010

Another reason the Pioneer Woman rocks!

She's generous.  :)  She really loves to give things away a lot.  Here's one of her latest giveaways, where you can win one of two HP All-in-One Printers she's giving away.  You can enter twice and until the end of this month.  So check it out if you are interested, or in need of a great new *free* printer!  :)  This is a pic of the printer you (or I) could win!  Sweet huh?

Sugar Cookies

These are a staple on the cookie table come Christmas time!  There are plenty of recipes out there, so today I thought I would try a new recipe (for me) and it's also from the Joy of Cooking by Rombauer.  :)  I was pretty impressed with how the turned out too...although I think my favorite sugar cookies will still be the ones my Mom makes.  :)  I also had some fun with frosting/icing them this afternoon.  
Do as I say and not as I do.  Put something like a plastic cutting board underneath when frosting/icing your cookies. :)
This recipe is called "Roll Cookies" and can be found on pg. 711 of the Joy of Cooking cookbook.  I will also post it below...
Cream:
1/2 c. sugar and 1/2 c. butter
Beat in:
1 t. vanilla
2 eggs
2.5 c. flour (all purpose)
2 t. baking powder
1/2 t. salt
Chill dough for 3-4 hours. (Although I only did about 30 minutes...)
Preheat oven to 375 degrees.
Roll and cut cookies.  Place on greased cookie sheet.  Bake 7-12 minutes.  (I only had to bake mine about 6-7minutes)
Roll it.  Mark it.  Cut it with a star cutter.  Stick 'em in the oven for you and me! ;)
 Then once all my cookies were baked and cooled (on cooling racks) I started my frosting and icing.  :)

It was just a simple recipe that is Powdered Sugar and water until you get it to this consistency for the icing.  And then add more powdered sugar for the frosting.  :)  Make it what you want it to be.  Add flavors or colors if desired!  :)
 Like I said....color 'em if you'd like.  :)
 You can pipe frosting around the edge, let dry and fill with colored icing.  Or dip cookies into icing...or...
Do whatever makes your heart happy and sing!  :)
Happy Baking!!!!!!!!!!!!!!!!!!!!!!!!!!!!! :)
Related Posts Plugin for WordPress, Blogger...